 | |||||||||||||||||||||||||||||||||||||||||
 |
 |
 |
 |
 |
 |
 |
 |
||||||||||||||||||||||||||||||||||
|
Home > Bridge Construction Set > Manual > Custom Levels How to create custom levels In the main menu, click on New Level. You'll see an empty landscape, but you'll start in the 'bridge edit mode'. To enter the level edit mode, press F3. You'll see three labels on top of the screen - Landscape, Objects and Props. Landscape Basic: Enter Landscape mode. To create the need for a bridge, let's first make a river. Select 'Lower' from the menu on the right to dig holes in the landscape. Ironically, you can adjust the depth of your river by changing the 'Height' parameter. You can also make mountains with the 'Raise' tool in the same way. Basically, 'Raise' raises the terrain to '+ Height' and 'Lower' lowers it to '- Height' everywhere you click. You can adjust the brush size with the 'Size' parameter. When you're done, adjust the water level by pointing your mouse cursor where you want it and pressing L. You should now have created something like this: 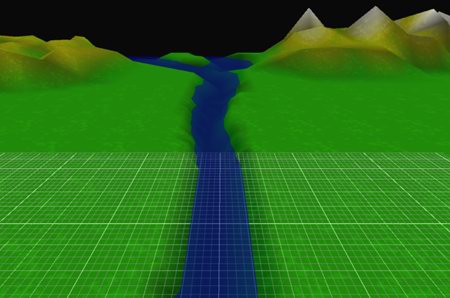
Advanced: You can move the 'reference plane' ('zero height' level) up and down with the R and F keys or press G to move the plane to where your mouse cursor is. You can also apply up to 4 different colors to the terrain (height-based layers). Click on 'Colors' to define them (the order is from lowest layer to highest). To define the color layers, set the reference plane to the desired height and click on 'SetClr1' to 'SetClr4' respectively. You won't see the results immediately, click on 'Texture' or press X to update the terrain view. 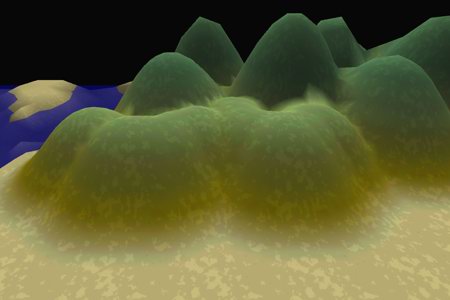
Adjust the wind and water flow intensity in the 'Wind' menu. The values shouldn't be set to zero, otherwise non-rigid bridges could be built (which often results in delayed collapses). Anchor points Basic: Click on 'Exit' to switch to bridge edit mode. Add anchor points by holding the period key (.) and left-clicking to create new ones or right-clicking to remove existing ones. 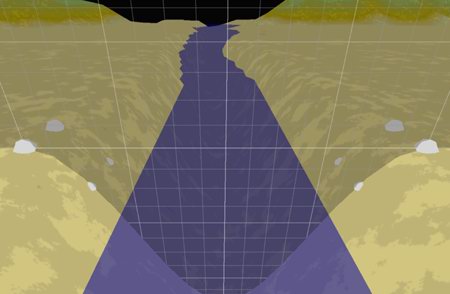
Advanced: You can move the editing plane(s) just as usual - with the R and F keys. Move the mirror plane with Shift-R and Shift-F. Reset it with Space. Objects / Vehicles Basic: Enter Object mode (you may have to switch to level edit mode first by pressing the F3 key). Click on 'AddObj' (or press O). You'll see a list of available objects/vehicles. Select any train. Now you should place the train to the left of your bridge. It will stay selected. To make it face the correct way, press X to rotate it in 90 degree steps. Now add some cars to it using 'AddCar'. Obviously, you can remove cars with 'DelCar'. If necessary, objects can be moved up and down with the Page Up and Page Down keys. 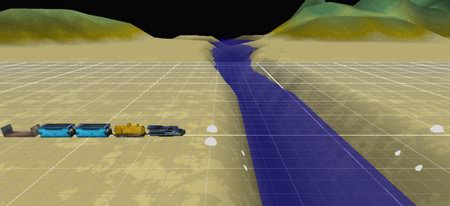
To tell the train where to go, you must now add at least one waypoint. Since the train is already selected, all you have to do is click on 'AddWayp' and then click where the train should go (preferably the other side of the bridge). You can add more waypoints if you like. Delete waypoints by pressing BackSpace while the train is selected. 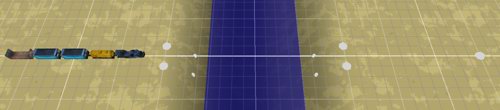
Now there's just one simple step left to make the train appear when you test your future bridge. With the train still selected, click on 'Phase 1' in the phase list on the right. This means that the train is part of testing phase 1. You can re-use it in the other phases as well. Now right-click to deselect it. In the menu, set the 'Phases' parameter to 2. This means we have 2 testing phases on this level. And 2 phases means we'll add another train. Just repeat the procedure once more, placing the second train on the other side of the bridge, making it face the other way and adding an appropriate waypoint. 
Assign the second train to phase 2. You can add as many objects as you like, just remember to assign them to a testing phase. Delete unnecessary objects with the Delete key. Advanced: Let's say you want to make it a drawbridge level. For this, we'll need to define when the bridge opens and closes and add a ship or two so that building a drawbridge here makes sense. In object mode, you'll see a selection: 'Object / DB up / DB down'. This defines what happens during the testing phases. Let's make our bridge open in phase 2 and close in phase 4. Select 'DB up' and click on 'Phase 2'. Now select 'DB down' and click on 'Phase 4'. Select 'Object' again. You'll notice phases 2 and 4 are now grayed out. This means you've done everything correctly and now those phases belong to the hydraulics. 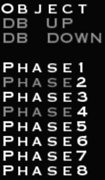
To make everything else work as intended, re-assign the second train to phase 5 and then add a ship or two (complete with waypoints) and assign them to phase 3. Set the number of phases to 5. Done! Don't forget to enable the hydraulic links in your level! :) Testing, Materials and Budget Now is a good time to extensively play-test your level and adjust the budget and the amount of materials that will be available to the player (you can do this in landscape mode). You should also fine-tune the wind strength and the amount of cars attached to your trains to determine how difficult your level will be. Props To make your level prettier, you can add some props using the Prop mode. Click on 'PropName' (or press N). Select a prop from the list. Now click on 'AddProp' (or press P). 
Now just put the stuff anywhere you like. Left-click to add more of the same prop, right-click to stop. Now you can click on a prop to select it. While a prop is selected, you can rotate it in 45 degree steps using the X key, move it up and down with the Page Up and Page Down keys or delete it with the Delete key. Now give your level a name under 'Details' in landscape mode and use 'Save As' to save it. Congratulations, you've created a complete new Bridge Construction Set level! :) 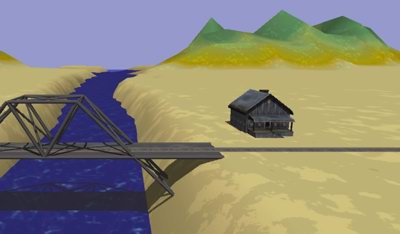
Back to the main page | ||